Giving Bits and Pieces of “Whole Brain Teaching” a Try! (A freebie!)

After a two full weeks back at work, I’m finally awake enough past 6pm to post. Miracles do happen. I thought I would post about one of the things that has kept me from not going completely insane just yet.

I have a very interesting crew this year. They come from all different schools (can you say “rezoning chaos?”), which means they come from places with all different rules, procedures, and expectations. Getting a class full of preteens on the same page as far as all of that goes is by far, the hardest task I’ve experienced in teaching.

Over the summer, I did some research on Whole Brain Teaching. I don’t like all of it. Some of it seems like forced memorization vs. actual comprehension. So naturally, I took the parts I liked, and made them work for me.

The parts I have implemented so far are the callbacks of “Class, Yes”, “Teach, Ok”, “Switch, Ok,” and “Mirror, Mirror”.  My group of kids NEED constant engagement, or chaos breaks loose very quickly. I have already found that using “Teach, Ok” as often as possible saves everyone a bit of sanity. Using the “Class” callback is far from perfected just yet, but it DOES get their attention, and it does give them a chance to be loud, if even for a brief few seconds.

As far as “Teach, Ok” goes, I do not do it the way WBT normally does. Instead, I pose a question, have students ponder quietly on their own, and then “teach” their shoulder partner what they know or what they think. I also use “Teach, Ok” to have students summarize a concept or lesson. But having them yell exactly what I’ve said at the top of their lungs at each other, at the same time? No thanks, WBT.

In any case, here is the freebie of the posters depicting the four callbacks I use, and have hanging in my room right now!

Picture 9

Click here: whole brain teaching

So, in between all of the WBT, I found a few minutes to snap pictures of my kids in their favorite spots to read.

Under a table.

pic 10

At the computer.

Picture 11

In my chair, and under desks.

Picture 13

Under all of the backpacks.

Picture 12

And in the spot they will all claw each other’s eyes out to be…the Reading Zone. (It’s okay, it’s my favorite too!)

Picture 17

Picture 21

Time to get ready to tackle yet another day. Second Friday in, though! It can only get better from here…I hope! 😉

First Day Jitters! Ten tips to keep you sane!

Tomorrow marks the start-up of the 2013-2014 year for us! I’ve spent the entire last week preparing, so I feel oddly calm. (I’m sure I’ll feel less calm around midnight tonight, as I stare at the ceiling and pray for sleep.)

So as I embark on my third full year of teaching, I thought I would share some of the ways I keep myself and organized and sane as possible as a new school year begins.


1. Start planning to plan over the summer. Everyone knows summers for teachers are hardly a relaxing few months, so take advantage of your antsy-ness. Make lists of new things you’d like to try, draw out plans for how you will organize your room, where each type of bulletin board setup will go, and what materials you need for each. Look on Pintrest and teaching blogs for decorating ideas while you have the time to consider and reconsider. Then get the supplies you need while you still have time to change your mind! (Why? Because I’ve done this and I’m glad I had the time to go nuts!)

2. During preplanning week, keep a notebook on you. Make lists of the things you still have to do, so you can cross them off as you go and feel super duper accomplished!

3. The weekend before school starts, whip up some easy lunches for the entire week.  Now, I do this EVERY weekend throughout the year. I refuse to buy school lunch (ew, no thanks) so I’m left with preparing lunches each week. You know, ones that can be scarfed down in 10 minutes, so you still have time to run around and go potty. Easy lunches for me almost always consist of pasta dishes. I love pasta salad, because it’s easy to make and play around with, and doesn’t need to be heat up.  I also like making mac-and-cheese (Annie’s is great, organic, and doesn’t have icky artificial dyes…sorry, personal rant) with peas, because it’s super quick to heat up. I always make sure I have things that are easy to bag up ahead of time too, like grapes or strawberries. I separate portions into snack bags on Sunday. It makes it easy to throw everything into my lunch bag each night.  Moral of the story: prepared lunches are ONE less thing you have to worry about each night.

4. Set out your clothes the night before! Nothing is more stressful than trying to put an outfit together at 6am, in the dark, and realizing you hate how you look in those pants now. And then you have to find a shirt that matches other pants and before you know it, you want to pick up the phone and cry to your mom. Save your sanity. Pick out an outfit in the night before, and try it on if you aren’t sure you still love yourself in it anymore. If your hair cooperates, also do that the night before. I have the luck of being able to shower the night before and sleep on hair and wake up with it looking even better in the morning. If that works for you, DO IT. If not, sorry for unintentionally bragging.

5. Get to school early. You know you will be waking up every few hours anyway. So just get up early, get that coffee going, and get to school. That way you have plenty of time to rearrange, rearrange, and rearrange some more when you walk in. You’ll feel a lot more calm when the bell rings that morning!

6. Greet the students with a warm smile, a “hug or high five”, and have something prepared for them to do when they walk in. I got this fantastic play-dough idea from clutterfreeclassroom.com, and will be utilizing it this year. I just made two batches of play-dough, and placed them in baggies. It will give the kids something to do with their hands and all those jitters as I get them organized in the morning. And yes, even 5th graders LOVE play dough.

970318_10153089412210268_1561902673_n

7. Keep yourself over-planned for the week. Make sure you have more activities than you could ever get through in any given day, and have them prepared to get to (if they are worksheets, surveys, art projects, etc.) or prepared to discuss and deliver. Prioritize them as “must-do” and “may-do” on a list or in folders, labeled by the day. Then go through them accordingly! Any extra activities can be delivered as needed.

8. Be prepared for everything to take for.freakin.ever. If you need to be at specials at noon, get the kids ready at 11:45. You will want to go through all of the procedures for walking in line every.single.day for at least the first week. This takes time, but it is well worth the investment.

9. Have a way to deliver expectations and procedures prepared and outlined. Know exactly WHAT procedures you are going to need to teach ASAP (walking in line, eating in the cafeteria) and what can wait a little (how to hand in homework). Be sure to have a schedule of when you will be teaching each procedure or expectation, and  a way to communicate it. This year, I’m going the PPT route. Of course, I don’t need to list everything out for them. I will discuss the overall expectation shown on each slide with them in detail, but this helps me stay on track. And monsters are cute!

Picture 2

Picture 3 Picture 4 Picture 5

(The last one is how I plan to introduce the concept of “integrity”…one word my kids almost always learn right away.)

10. Breathe! It will all be okay. Remind yourself that while you are sure to forget something that you planned to do, it will be just fine. The kids won’t even notice as long as you smile and nod and look like you know what you’re doing. Be friendly but firm, and know that this week is all about setting those expectations, getting to know your kids, and helping them get to know you. Be flexible. Accept that nothing ever goes exactly as planned! But most importantly, enjoy how amazingly quiet those children are on the first day. It will never happen again.

Good luck to all my teacher friends starting this week! Here’s to an organized and sane year for all! Cheers!

Helping Your Students Stay Organized, Too!

It’s fantastic if we can get and keep ourselves organized. As teachers, that’s a priority. But there are times when it seems as though we are only as organized as our students. This year, I’m on a strong mission to help my students develop organizational skills. That said, I also recognize that my kids are 10 years old and will need my help.

One thing I realized I can do is give them something as simple as a calendar each month. Obviously, they are still responsible for recording their homework each day in their planners. However, since I do have some “big dates” that I already know about, it makes sense to record these for the kids to see. It also helps involve parents who wish to help their kids plan ahead, and can easily scan over the calendar and keep certain dates in mind. I plan to record test dates, assembly dates, field trips, and important due dates on these monthly calendars. My hope is that aside from keeping up with their kid’s work, parents can see “important” dates and refrain from scheduling doctor/dentist/everything else appointments on these. But that’s just hopeful, I’m sure.

That said, my issue was how to ensure that they don’t lose a calendar as easily as they lose their spelling lists. (Which is apparently, REALLY easy to do.)

I ventured out to Walmart, and found economy binders for a whopping 92 cents! I can’t seem to find them online for you, but I guarantee you can walk into any local Walmart and see these babies front and center.

Then I created labels to go on top. These aren’t the exact ones I created (binder labels 2), but that’s because the ones I used for my own have gone mysteriously missing and these much more pretty ones are on my computer. I can’t explain these things.

I used the one and only mod podge to attach the labels to the binder because I despise the interaction of tape and children. (My room is magnets and velcro this year for a reason.)

This was the result:

photo 1


They are numbered so that I can scribble names on and possibly reuse (magic eraser, anyone?) if a student is about to transfer to another school.

Using a cover slip, I placed the calendar for the month of August inside and attached to each binder. Ah-ha! My best bet for keeping these calendars in one place.

photo 2 photo 3


You can download a FREE pdf file of these calendars (here you go: student calendars), however, I cannot for the life of me get them to become editable yet. I’m trying to resist paying for software to do this, but it may become necessary soon. In the meantime, I heavily recommend printing them out, writing on top for the important dates, and simply photocopying them at school. It may be your best bet!

Enjoy!


Classroom Reveal and a Freebie! (Picture heavy!!!) 2013-2014

~Classroom Reveals~ are the thing to do, aren’t they? Well mine is here! Partially. I still have some kinks to work out, and some finishing touches to put on, but I did get a buttload done today. (Anyone know what a buttload is equivalent to? Anyone?) I want to start off by apologizing for the craptastic pictures. I forgot my camera today. 😦 I will retake pictures with my “good camera” on Monday though!

Ok then. Let’s start with the basics of the room, my tips, and end it with a freebie to help you organize your library!

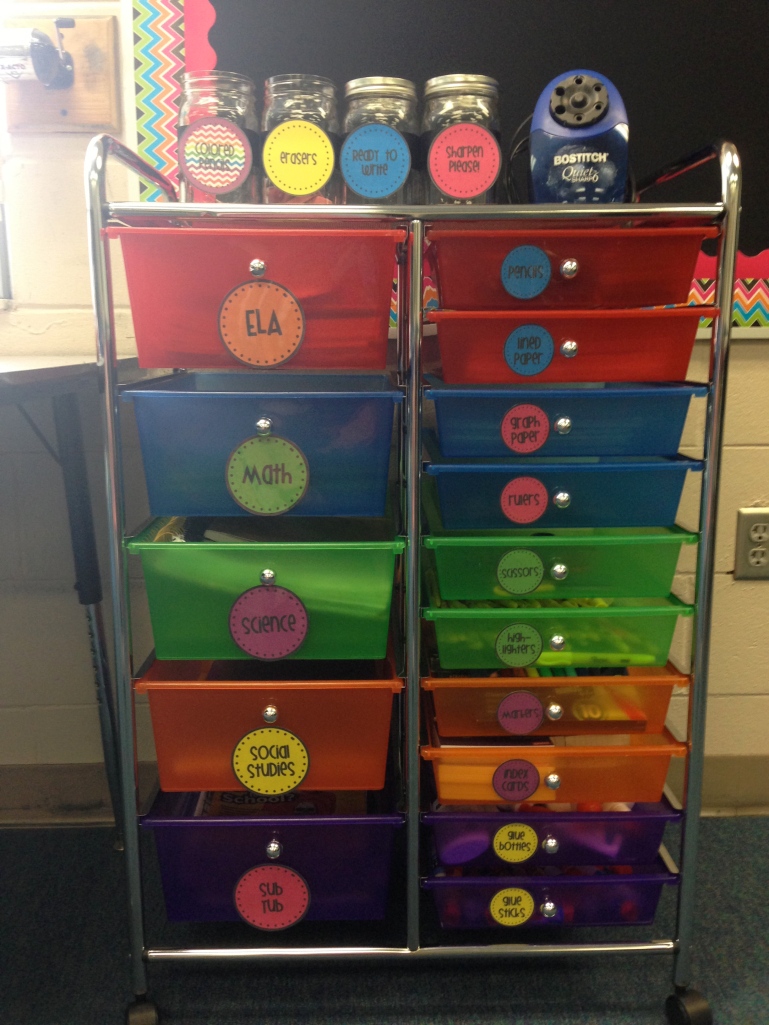
Meet Mr. Colorful Cart.  I posted about this in my first post, but now it’s labeled and filled! The left side holds each subject and the sub tub, and the right side holds supplies. Mostly, it holds the “extras”, but it’s much easier than sifting through a pile of crap in my cabinets when a kid needs a darn highlighter.

photo 4

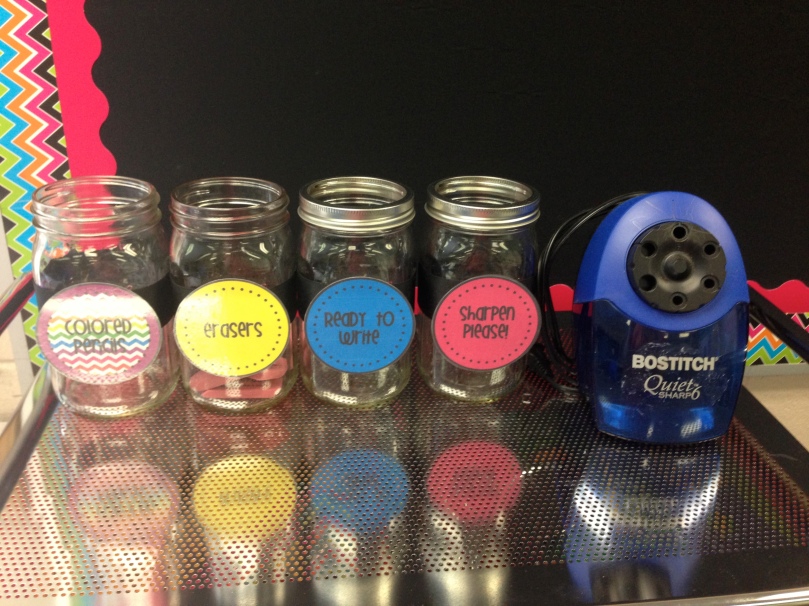
A close up of the mason jar madness. I can’t say I’d recommend using mason jars in the primary grades, but my 5th graders should be able to keep from smashing these, I’d think. I simply glued black ribbon around the jar and glued the labels, which I made, on top. I had to cover the word “ball” on it somehow, so it worked. Seriously, 5th graders would DIE.

photo 5

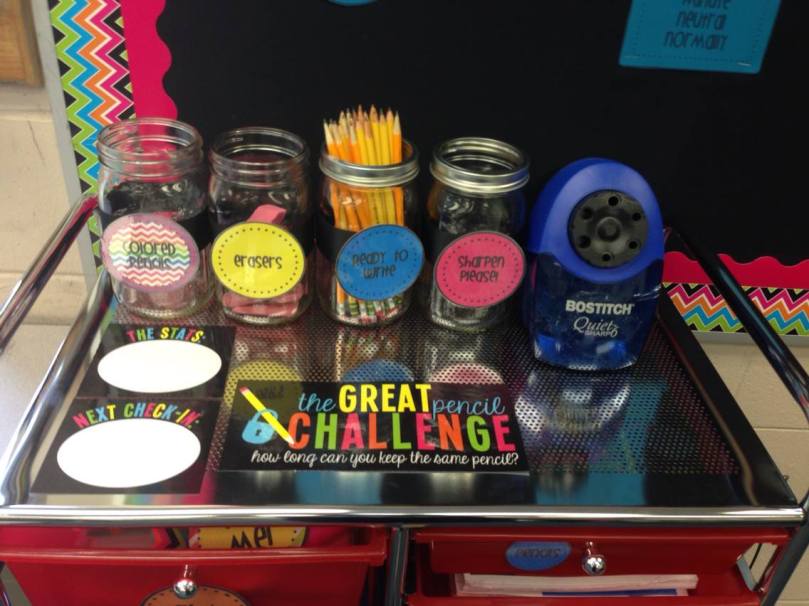
Updated with that fabulous pencil challenge we are all obsessed with trying:


664801_10153069357730268_922036142_o

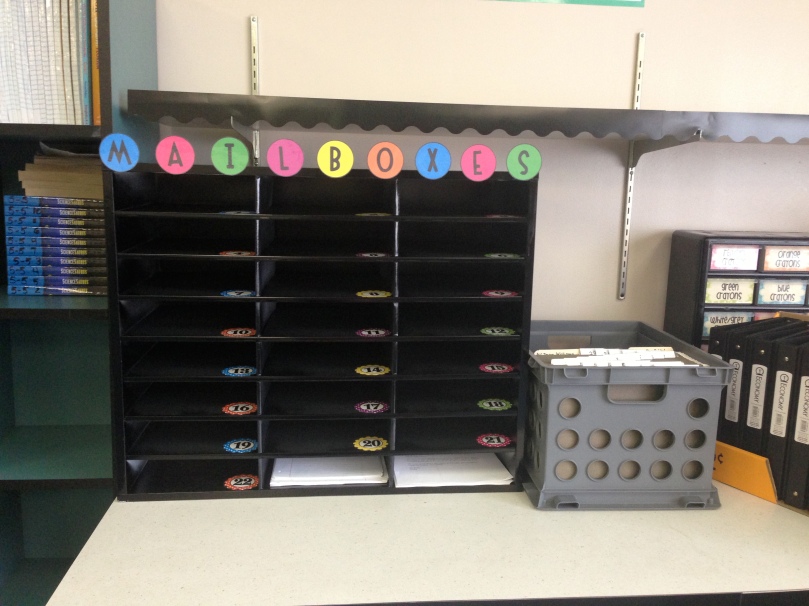
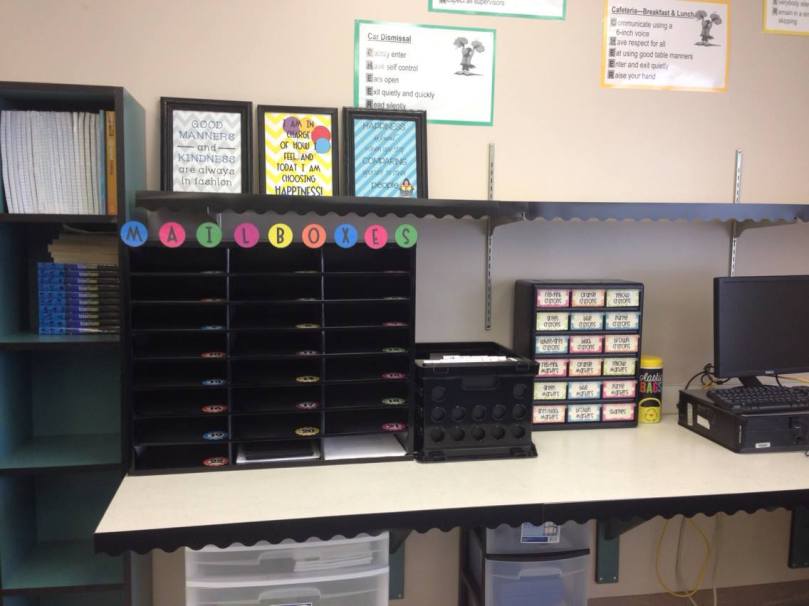
My mailboxes in their home again. And don’t worry, the crate to the right will be spray painted by Monday, of course.  I covered up the edges of the shelves and table with border. Just a simple touch that jazzes things up!

photo 1

ETA: Matchy matchy now!

1097701_10153069357755268_249357628_o

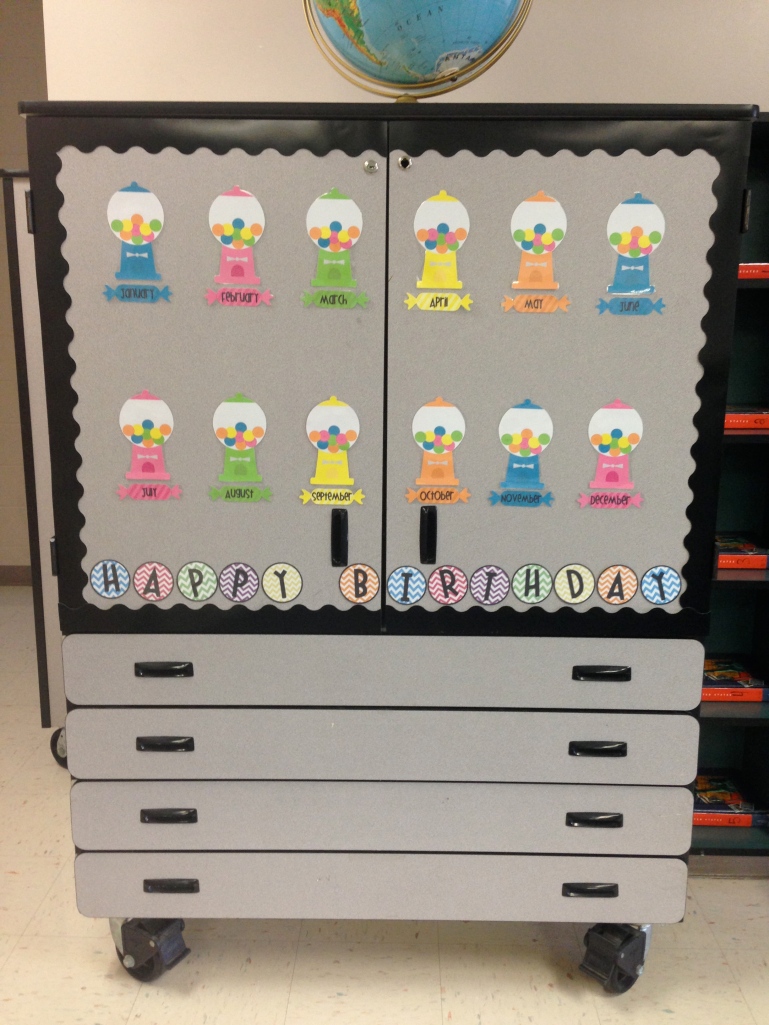
Organizing Tip: Utilize otherwise wasted space. This cabinet holds all of the necessary “stuff”, but is easily transformed into a bulletin board of sorts! Border the sides, and throw the stuff in the middle. Dunzo!

photo 3

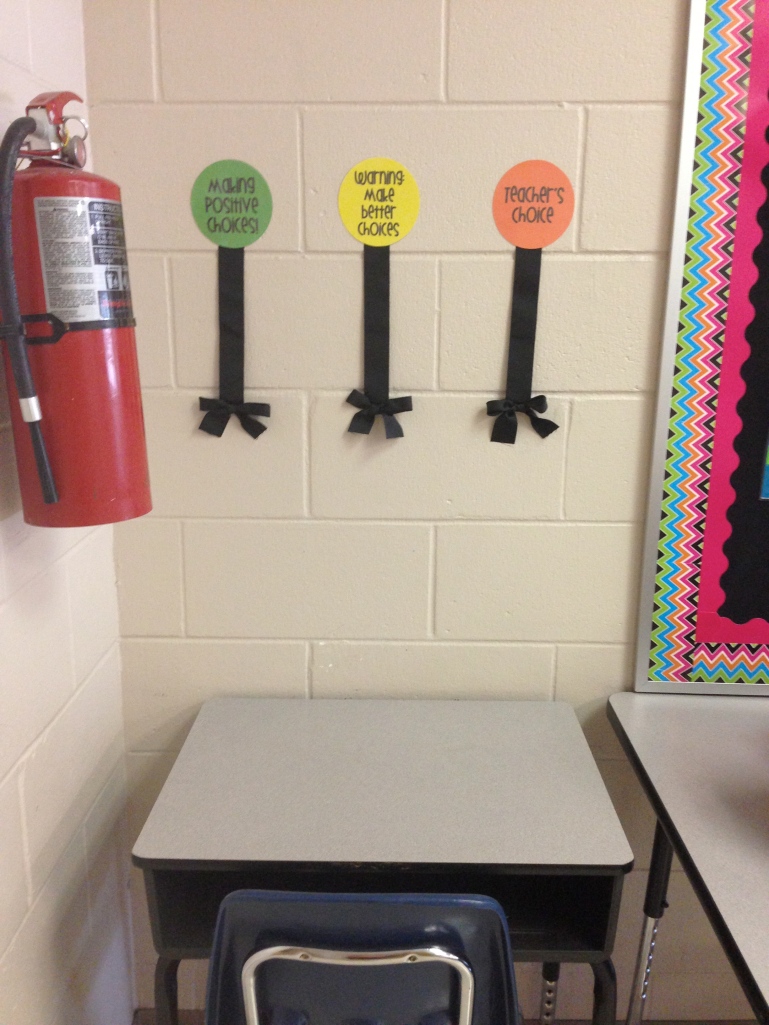
Organizing Tip: Have a reflection space, that is set apart from the rest of your room. It gives you a place to send a kid in need of a “time out”.  I prefer to keep my behavior charts/clips in this area too, as it’s a bit more discrete and isn’t hanging in front of the room for the world to see. That said, I don’t intend on using this system past the first month–I’ve never had to, anyway. It just becomes unnecessary once the kids are clear on what is expected of them.

photo 4

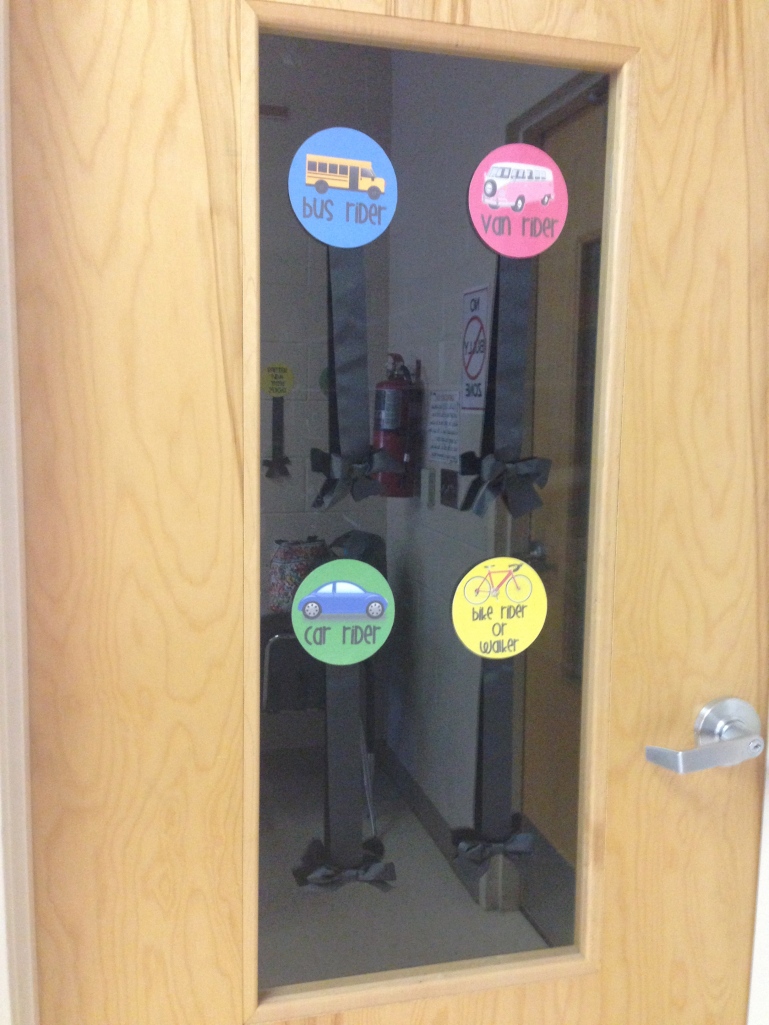
The very-needed “How in the world do we get home?” spot. I will be placing student clips with numbers on them, on the strip that shows how they go home. I will also be writing the bus number for each kid on the clip. This will save a lot of trouble when I get the sudden call from the front office, asking what bus number so-and-so should be on, because uh, they aren’t there. You can get a variation of these FREE signs in my TPT store, HERE.

photo 1

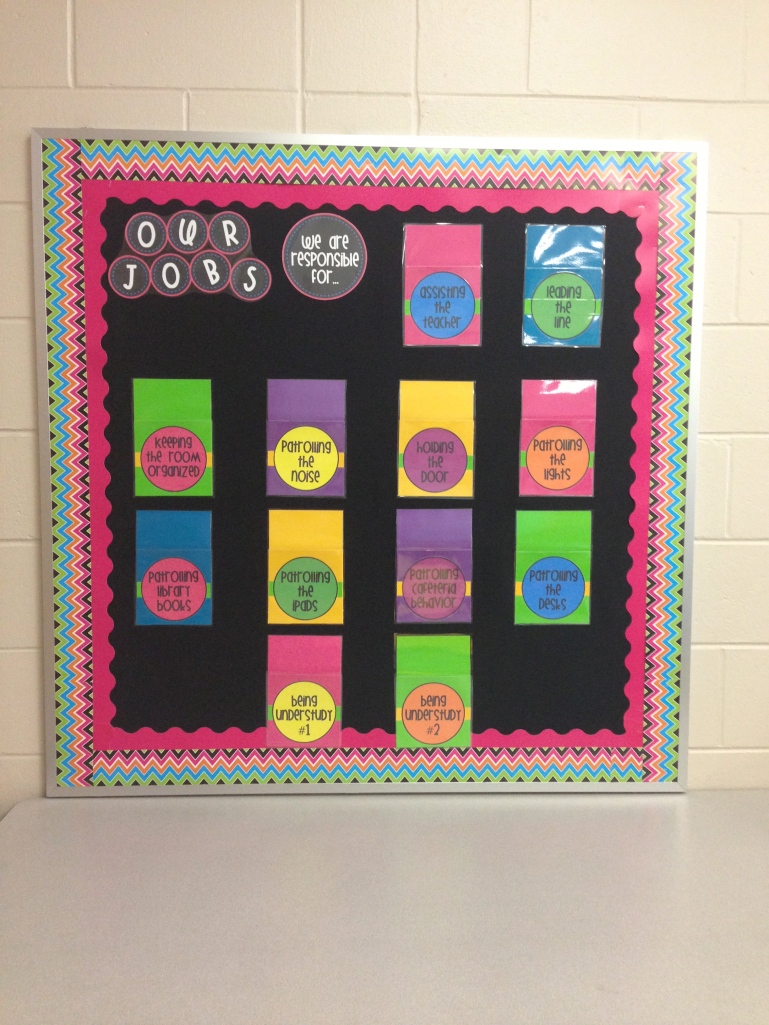
Jobs! It’s so important for elementary aged kids to have jobs designated to them. I switch mine out each week. It isn’t quite complete yet, as I need to stick paper in each envelope to write student names on. But the general idea is there!

My jobs are:

assisting the teacher – this child does anything I need them to do, period.

leading the line – leads the line at the start of wherever we are

keeping the room organized – this child usually cleans up the library more often than not

patrolling the noise – this child will use a hand signal to quiet the class when it gets “too loud”

holding the door – this child holds the door for the FIRST door we go out…then it’s the second person in the line for the rest. Otherwise this kid would always be running.

patrolling the lights – turns lights on and off as needed

patrolling library books – these are the school library books…so this kid brings the books down for check-in on the day we are assigned to go, so everyone can check out books

patrolling the iPads – this child counts iPads at the end of the day and makes sure all are accounted for

patrolling cafeteria behavior – this is new for me, but this child will be responsible for encouraging positive behavior in the Place Where Bad Behavior Mysteriously Comes Out

patrolling the desks – at the end of the day, this kid checks desks for organization and gives me a list of names of those who need a cleaning reminder!

being understudy # 1 and # 2  – so the class doesn’t fight over who gets to fill in for the job of an absent student

photo 5

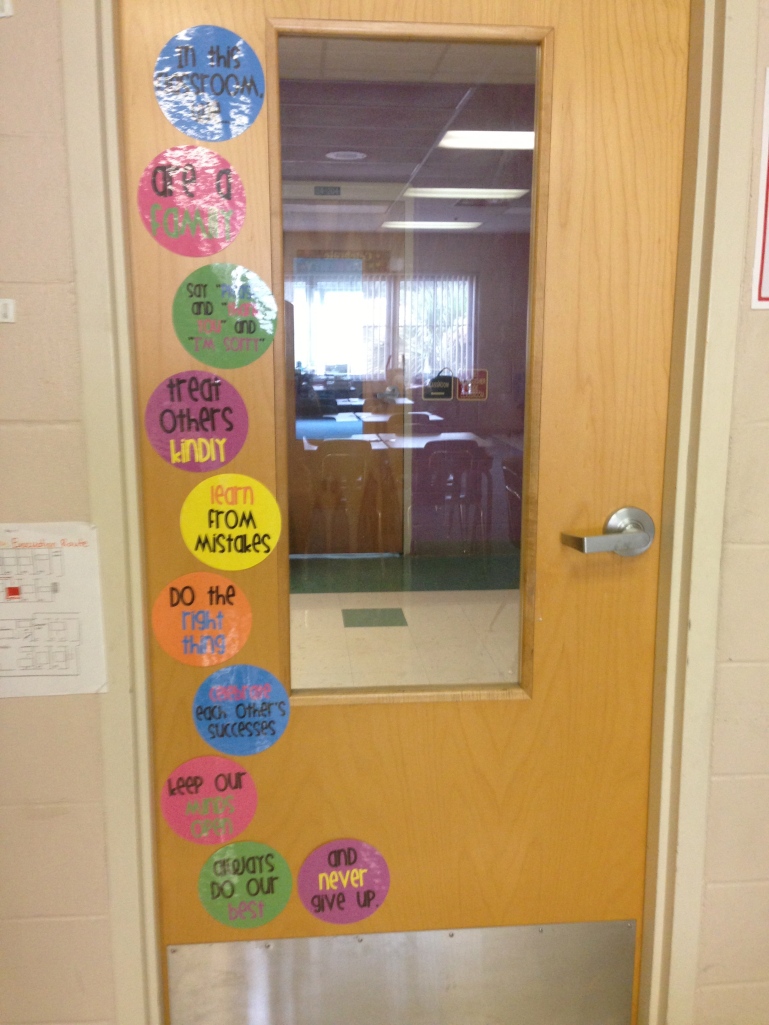
A nice little message about how this classroom is going to roll! It’s a little glare-y, but it says:

“In this classroom we:

are a family

say “please” and “thank you” and “I’m sorry”

treat others kindly

learn from mistakes

do the right thing

celebrate each other’s successes

keep our minds open

always do our best

and never give up!”

photo 2

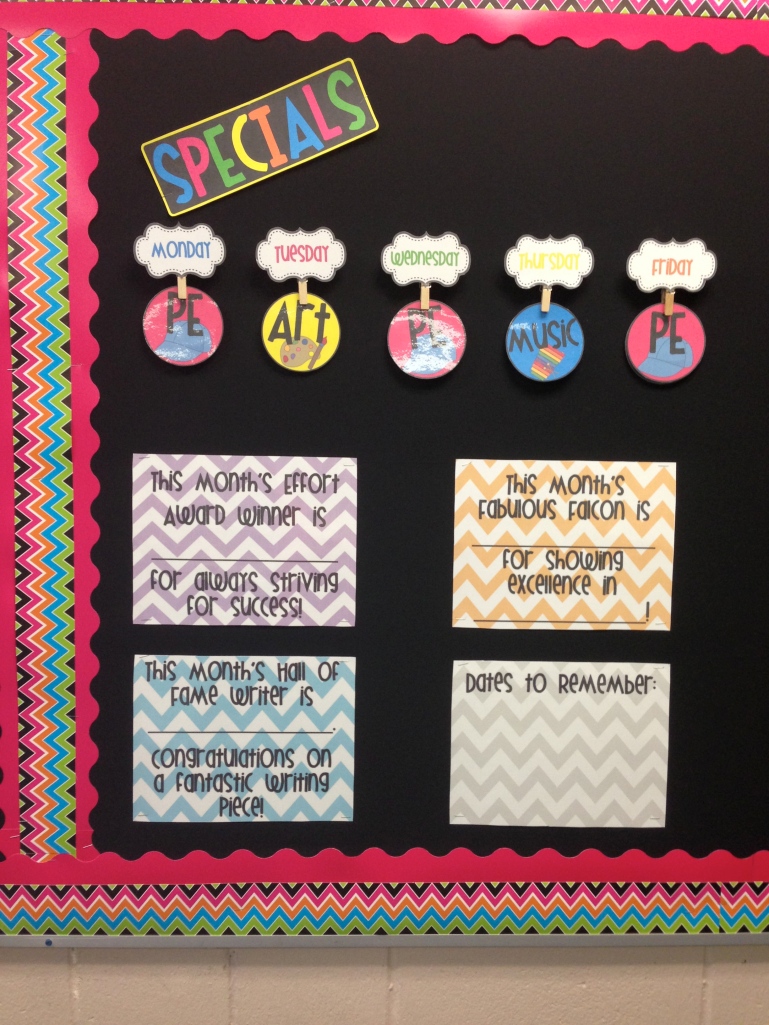
Keeping “Specials” organized! This bulletin board is behind my desk. I created labels for each day of the week and for the different types of specials we have at my school. I glued the day labels to clothespins, and glued the clothespins to the fabric I have on the board. And ta-da! Easy changing in and out of the specials schedule.

photo 1

My desk area. I covered up the front of my desk, the cabinet next to it, and the student desk to the side with fabric from Walmart. Seriously, $6 all together. Then I used border to frame it. The welcome sign you see if a part of a sign I made, which you can find on my TPT store HERE!

photo 5_2

photo 4

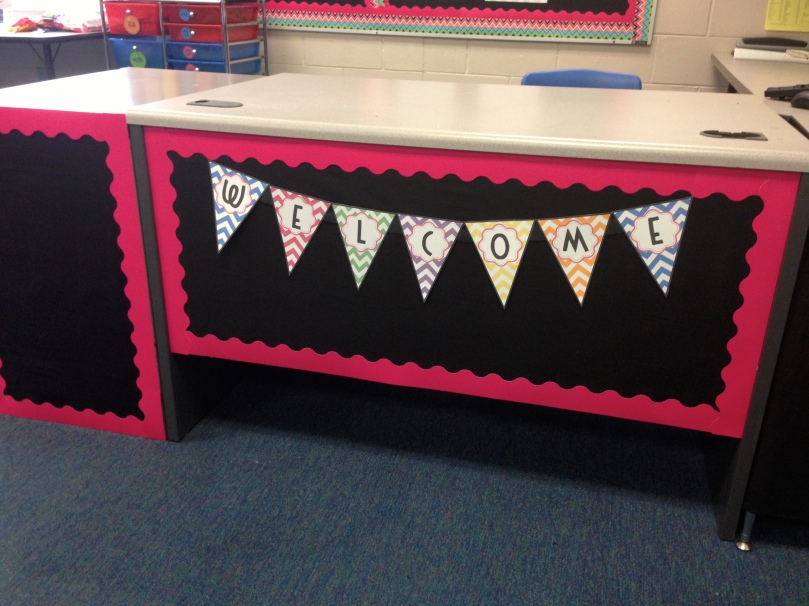
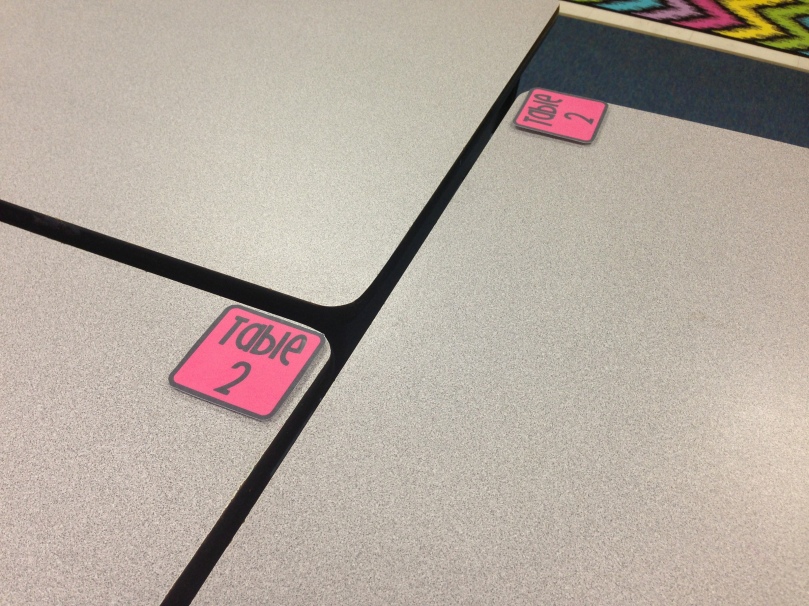
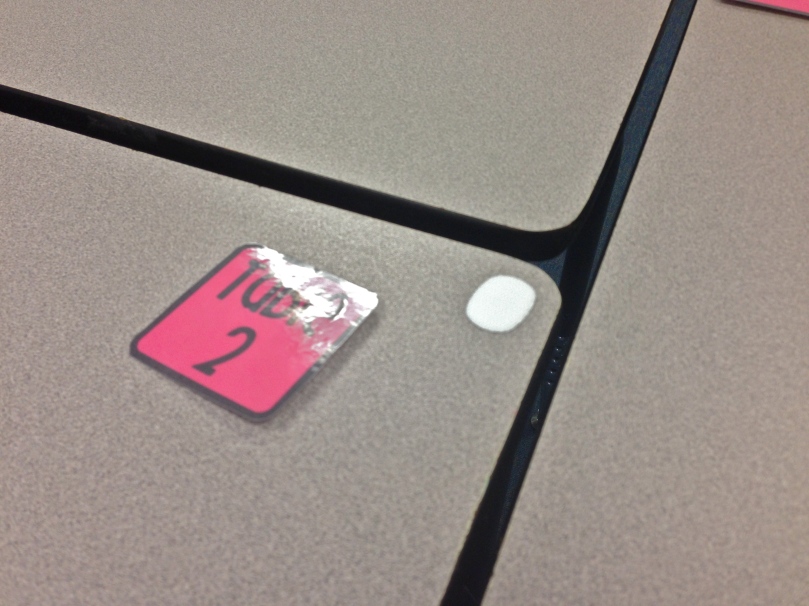
Table numbers! This year, I am doing numbers. As you can see in the second photo below, I velcroed each desk. That way, when I move desks around, I can simply remove the “Table ___” number and switch it out with the correct table number. That way, the table in the front is ALWAYS “Table 1” and so on. Heavy duty velcro is key!

photo 2 photo 3_2

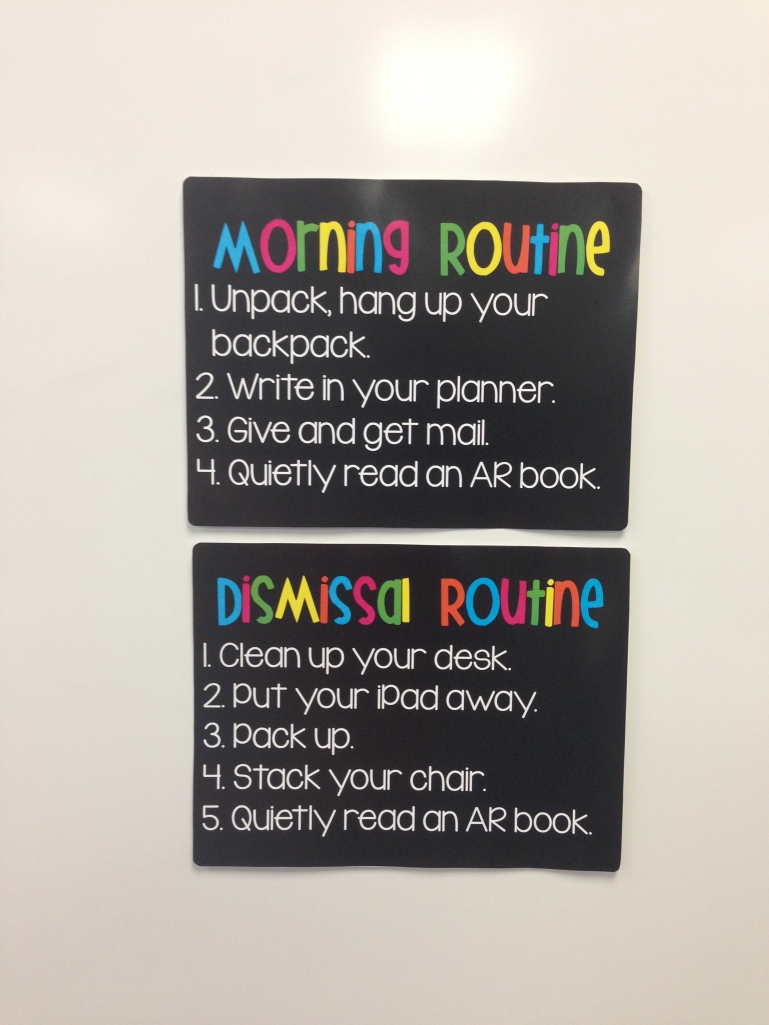
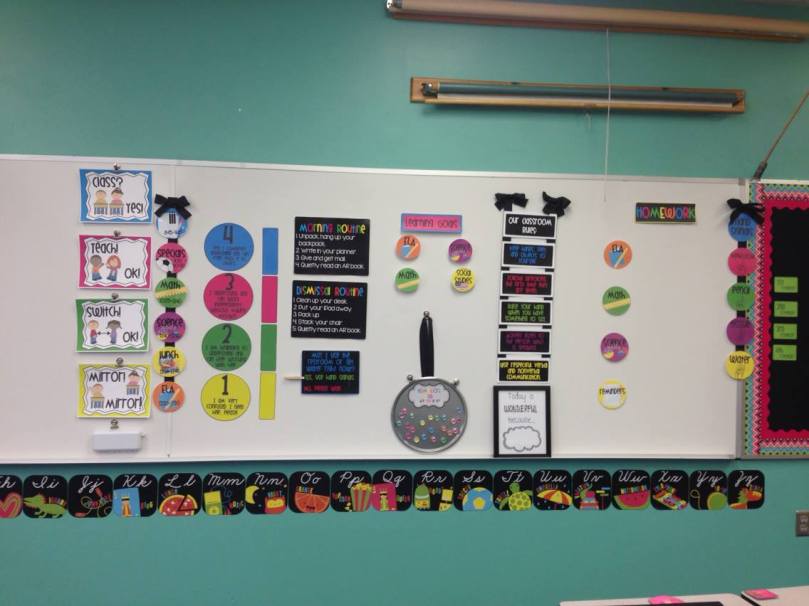
My morning and dismissal routine. Yes, my lovelies have iPads. It’s a gift and a curse, but mostly a gift! I created the posters with Staples. Freakin $14 a piece to print out…

photo 4

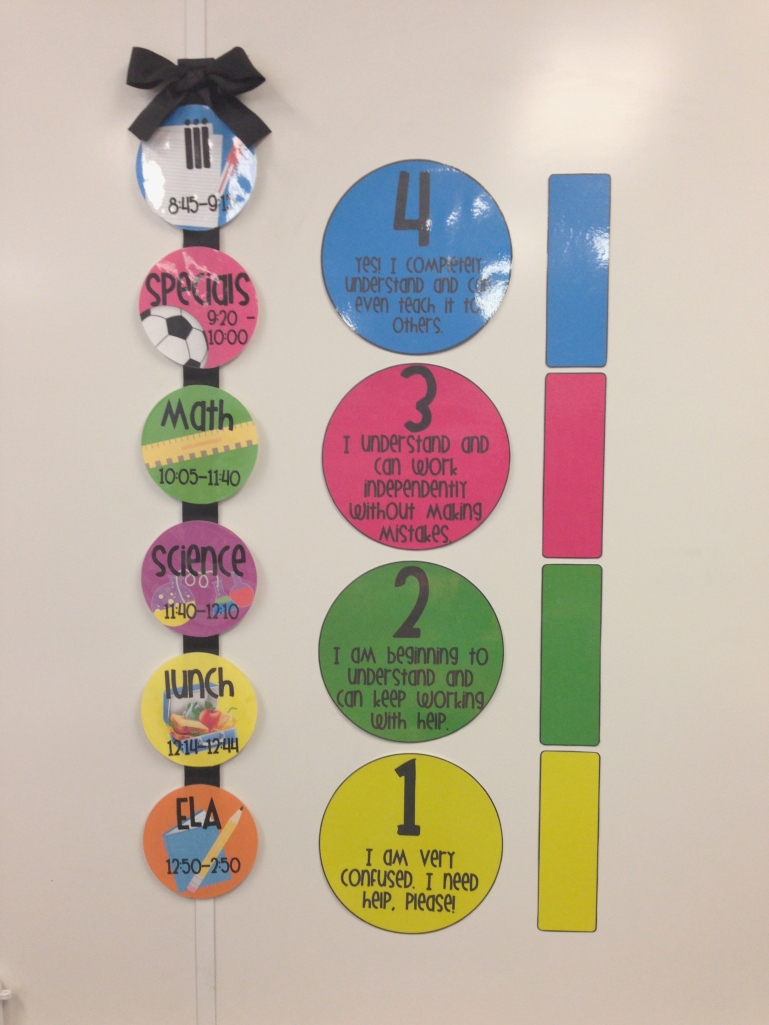
Our schedule next to the scale I will be using. I create magnets using those little vase gems, a circle punchers, and mod podge, and will be making new ones for these. That way, students can easily move their numbers according to where they belong on the scale.

photo 5

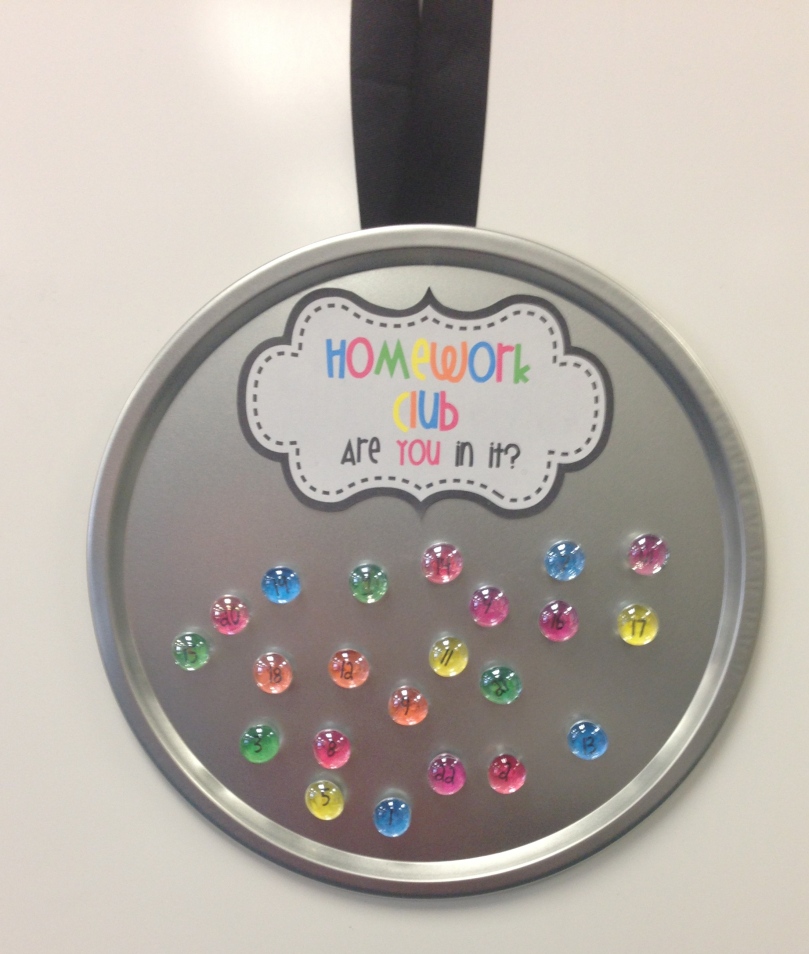
Oh wait, here is an example of the magnets! My “Homework Club”. The intention is like everyone else who uses this: reward the kids who do their homework for a month straight with a picnic, extra recess, or a special treat. At the start of each month, re-enter everyone again. Hopefully this incentive works!

photo 3

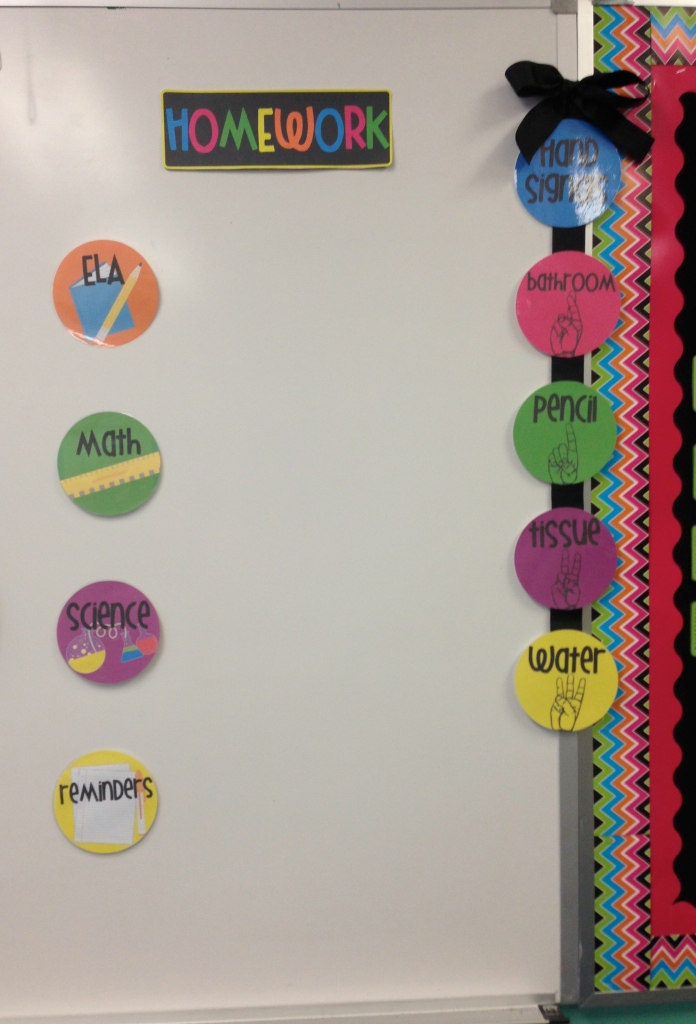
Homework and hand signals! Hand signals are sooooo necessary in an elementary classroom. It cuts down on a lot of unnecessary interruptions. When a kid puts up a signal, it’s very easy to either wave “okay” or shake your head no. Much easier than thinking a child is raising his hand to give you the best answer of the century to a math problem, only to realize he’s asking to use the potty.

photo 1

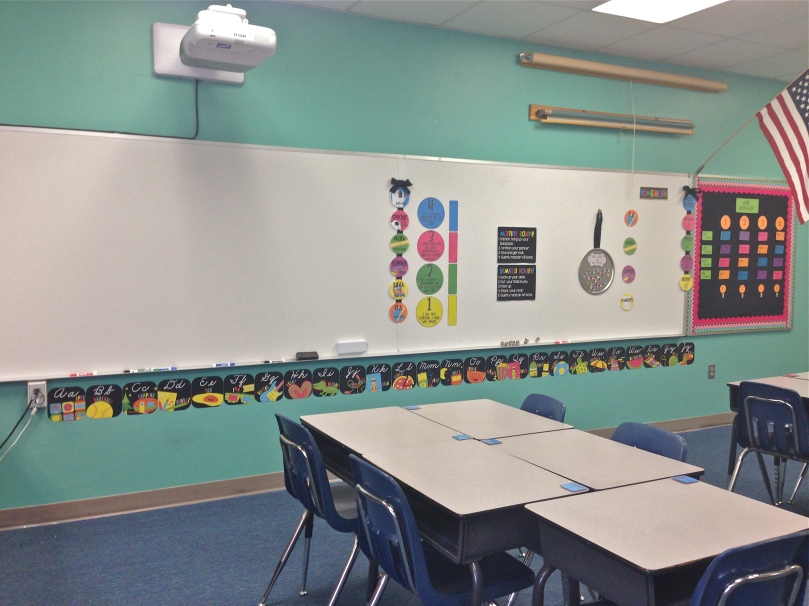
My whole board area! The alphabet below is a FABULOUS buy I found on TPT. Seriously, I’m getting nothing out of pimping her stuff, but I think she deserves a shout out.

photo 1_2

Updated with some more necessities:

1093808_10153069357750268_941989510_o

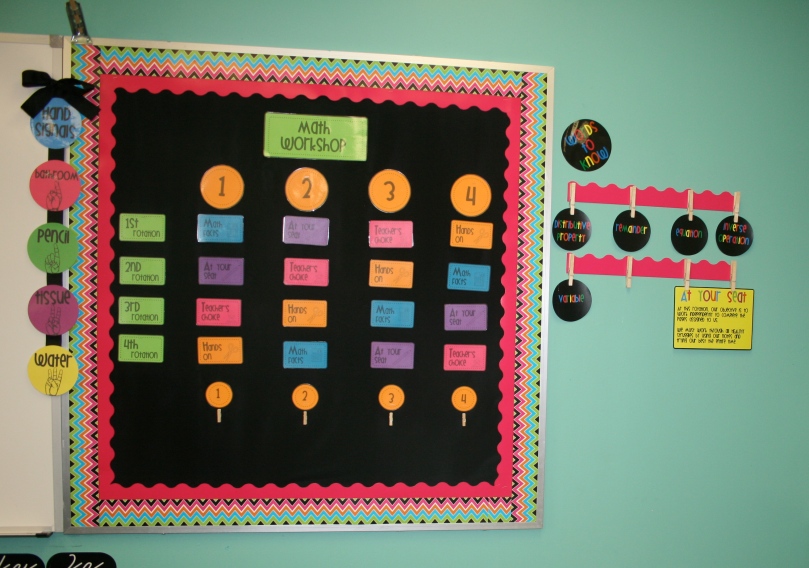
Math workshop board, which I will post more about as the year starts.

IMG_1954


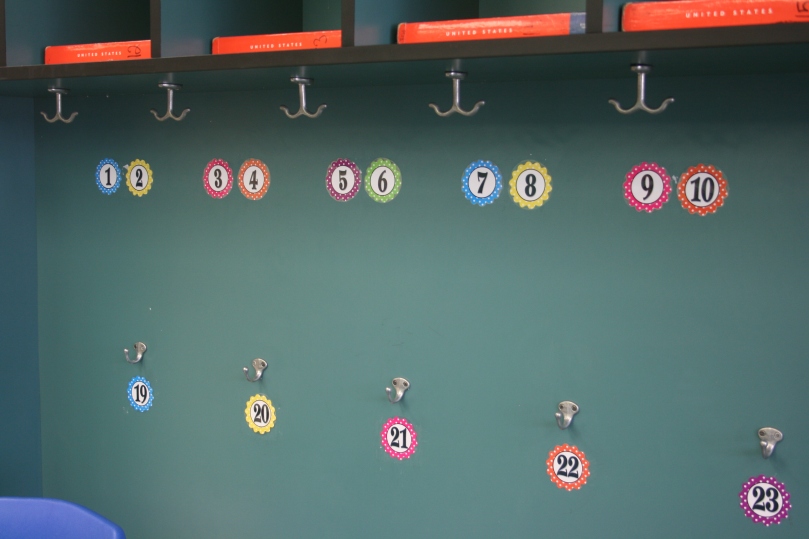
Labeled cubbies and coat hooks. Surely, I’m not the one who invented this idea, but it is something I definitely consider a “must” in my room. With each child assigned a number, it lessens the opportunity for arguing over whose coat/backpack is where, and it keeps textbooks from mysteriously disappearing (as much).

IMG_1965

And the pride and joy of the room, my reading zone!

IMG_1949

Lemme go more into detail with this one. What you see above with the ribbons is my AR tracking system. It goes from “Ready to be a Super Reader” to 100 points. They will move their clips along with the points they earn throughout the year. You can see them all lined up and ready to go here!

photo 1

The actual library:

photo 3

photo 4

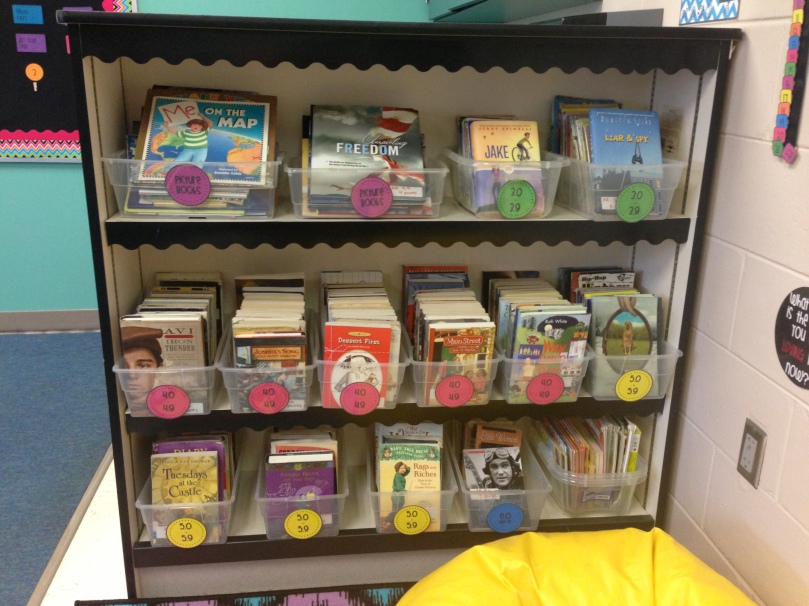
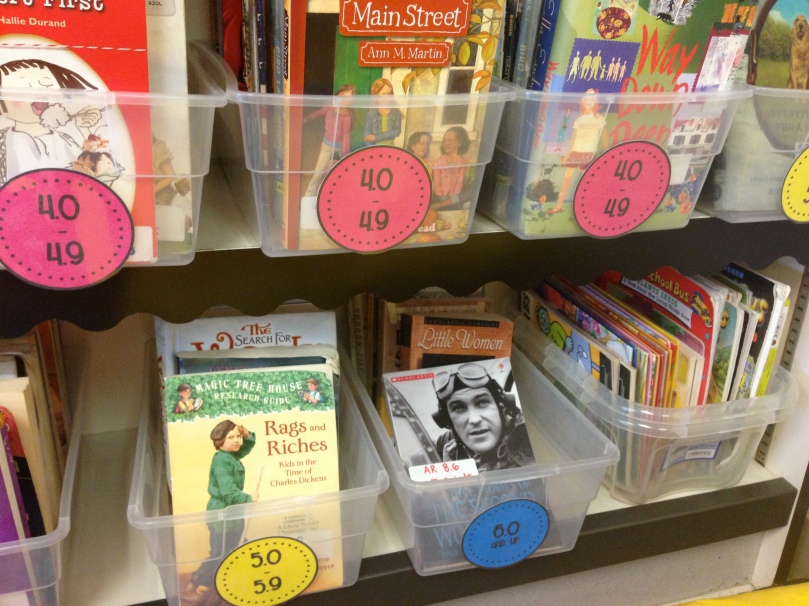
I organized all of the books throughout the past few years, and label them as soon as I get them. Then I sorted them into the bins and keep the kids accountable for putting them in the right spot. Last year, my kids had such a hard time with this. No clue why. But it always got back into shape with my Organizer of the week. 🙂

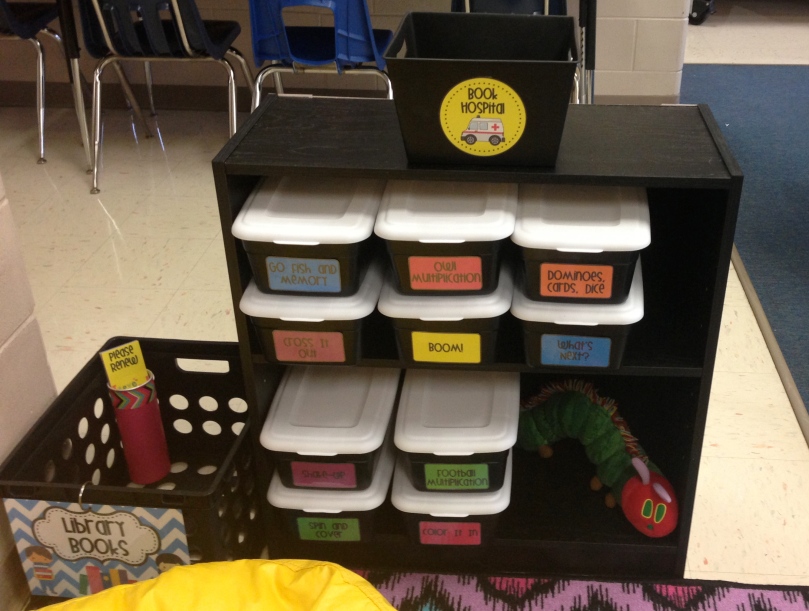
I got this nifty little shelf from Staples for like $25. Right now it’s holding all of my math center supplies, but that’s temporary. It will hold books and supplies soon, and I’ll of course post that too. The “Book Hospital” is a pintrest idea, and saves you from having to let the world stop every time a book has a boo-boo! Broken books go to the hospital and you fix them when you have time!

photo 3
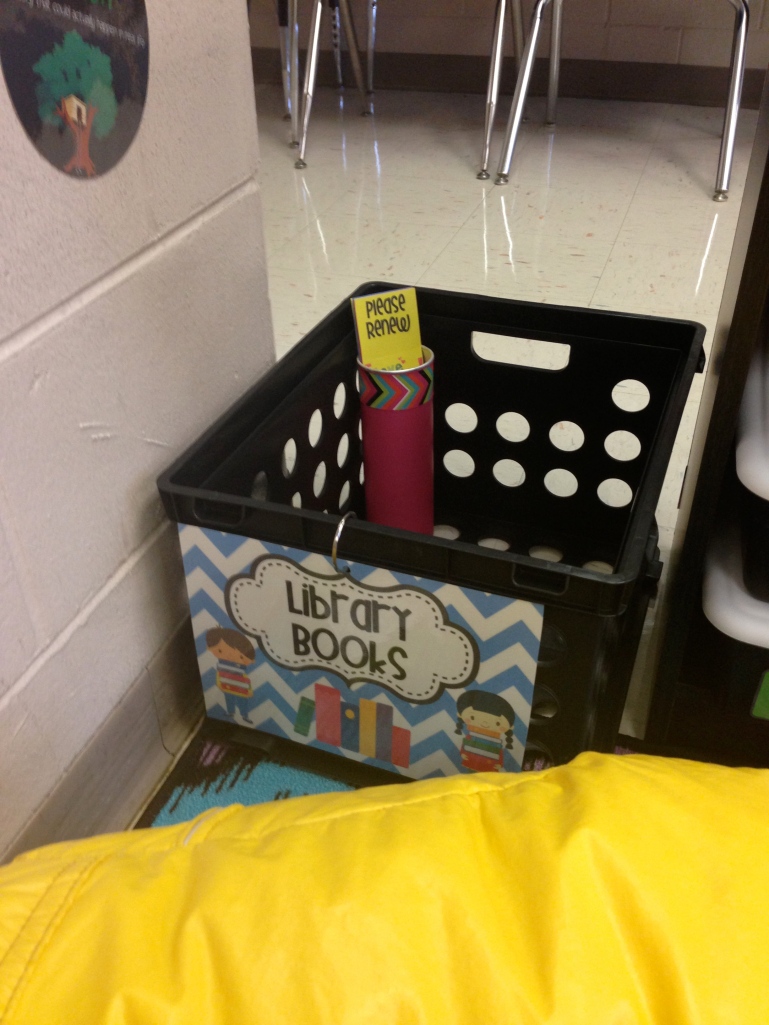
This is a stolen idea from somewhere. This crate will hold the school library books, and has “please renew” book marks in an old Pringles can! Genius. Just not my genius.

photo 2

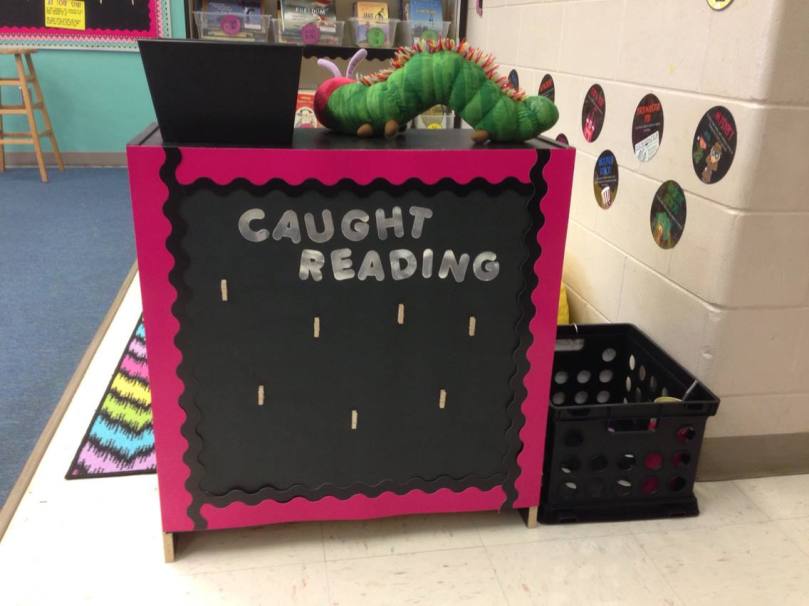
The back of the small bookshelf, which I glued itty bitty clothespins to, so that I can switch out pics of my kids who were “caught” reading. Just another way to organize space wisely, and get the most out of the “wall” space you do have.

1115987_10153069357740268_1546176295_o

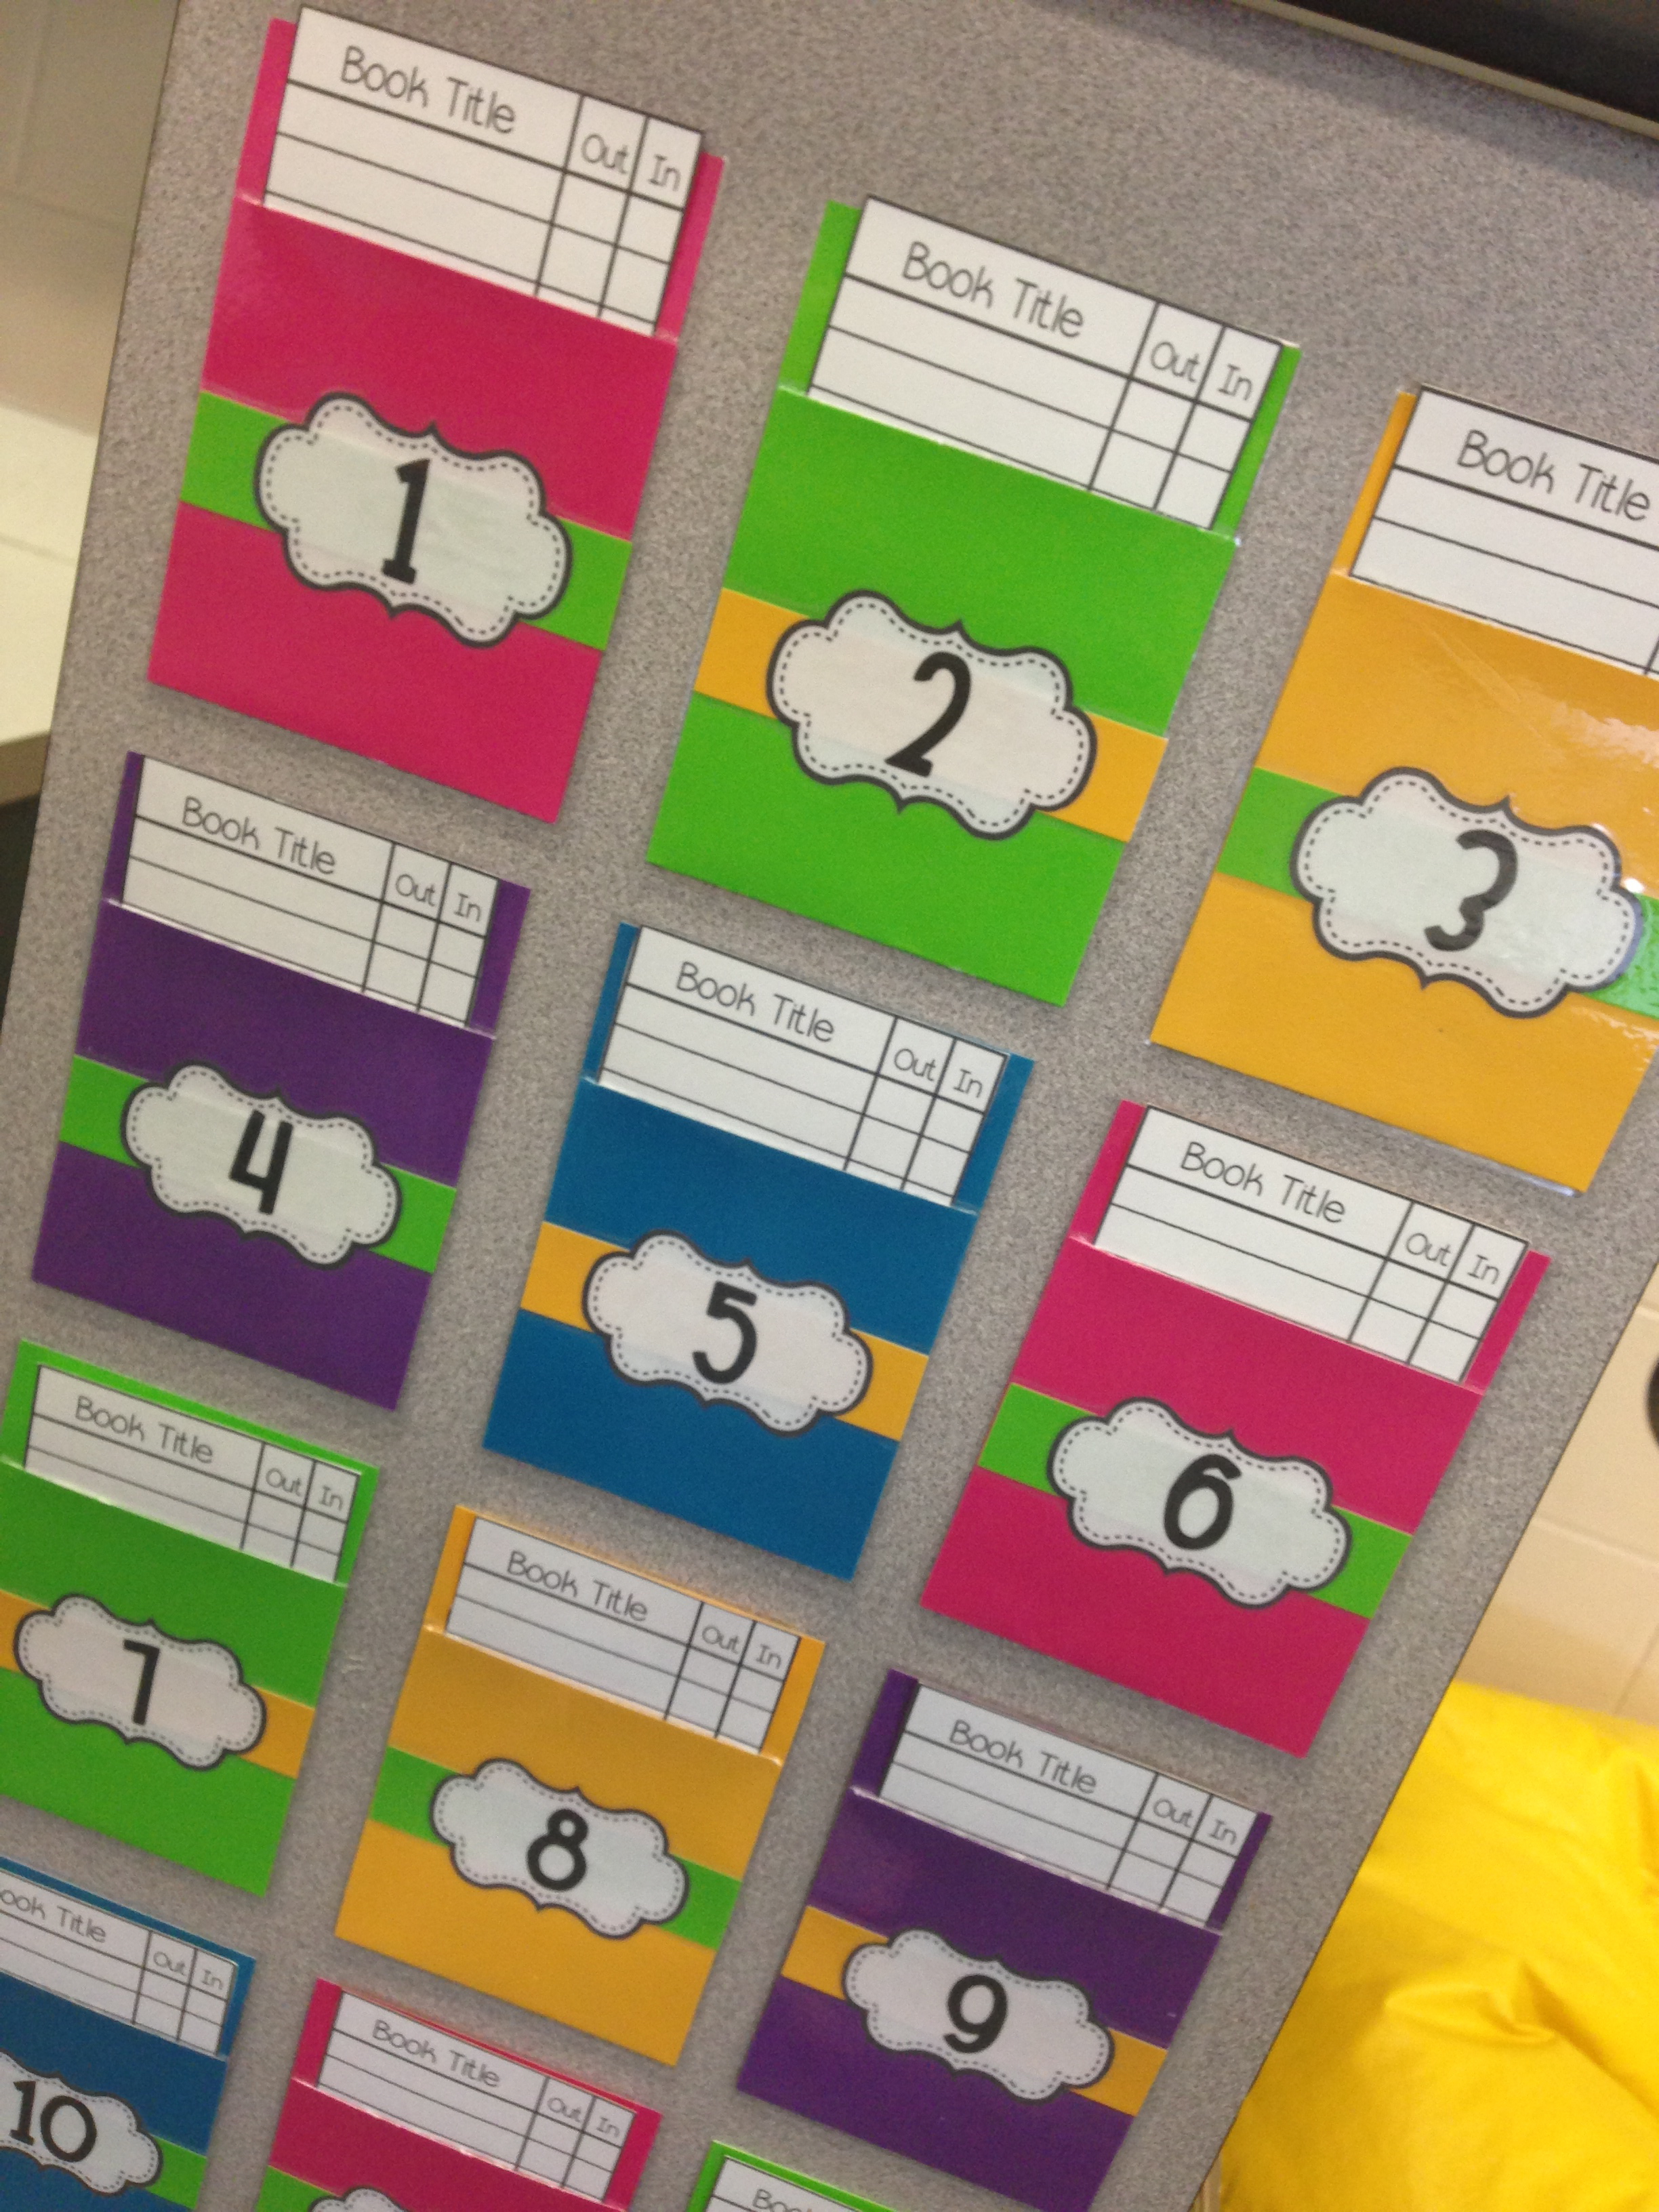
Andddd my favorite part, with the freebie! The library pockets!

photo 1 photo 2

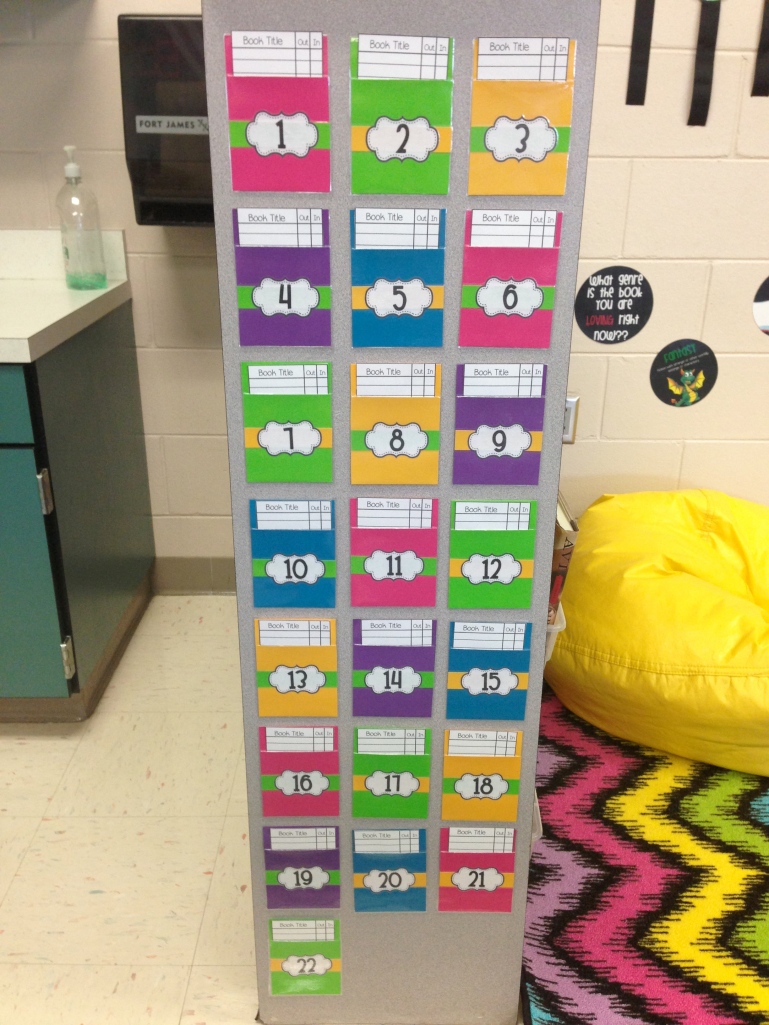
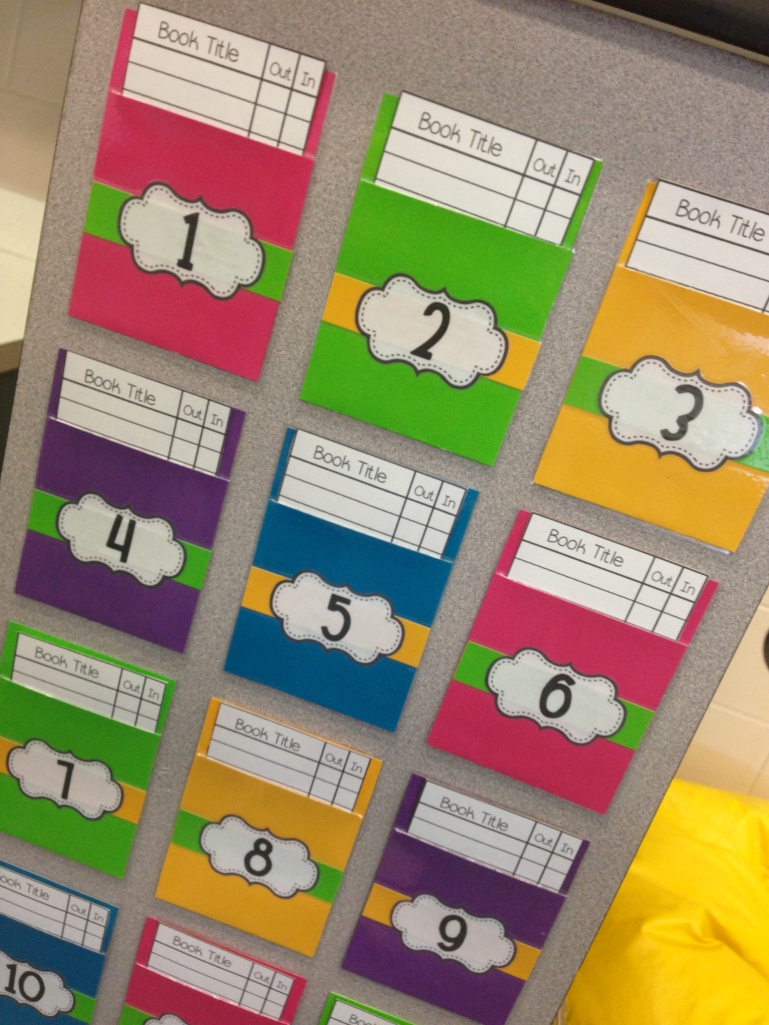
So, as I’ve said before, I assign each kid a number the day I get my roster. They learn their number very quickly. This makes it easy to reassign numbers too, when a kid moves or you gain a new one. The library pockets are pretty self explanatory.  When a student checks out a book of mine, they write the book title on their card. They write the date they are taking it out in the “out” column, and write the return date in the “in” column. It helps keep students accountable for where YOUR books are, and helps you figure out who might be responsible for a missing book too.

In this file, I have the template for creating library pockets (I suggest you print on colored card stock, and fold the bottom up to the dotted line shown), cut-outs for the strip behind the number label, and a set of 1-30 labels for the numbers. I also included the check-out cards. You can download here!  I laminated my cards, but you could just as easily tape the sides of the pockets, and not have to worry about lamination. Up to you!

So, whew! That’s it…for now! Please please please comment if you have a question or something that you would like clarified. I’m happy to help as I can!